This is a two part training session for making a DIY Moveable Alphabet Box
Thanks to Mrs Adanne Okenwa of Real Splendour Academy, Aba, Abia State.
Part 1 The making of The Alphabets and the box
Part 2 The partitioning of the box.
Mrs Okenwa Adanne: Good evening all, I’m Mrs Okenwa Adanne.
Ayopeju Falekulo: Welcome
Mrs Okenwa Adanne: Thank you ma for the opportunity to facilitate on this platform.
Ayopeju Falekulo: We are happy to have you teach us.
Group Member : Good evening ma
Mrs Okenwa Adanne: How to make a DIY movable alphabet box from the scratch.
Group Member : Welcome ma’ma
Mrs Okenwa Adanne: Without alphabet stencils
Materials needed are:-
Cutter, scissor, glue/gum thick cardboard sheets, marker.
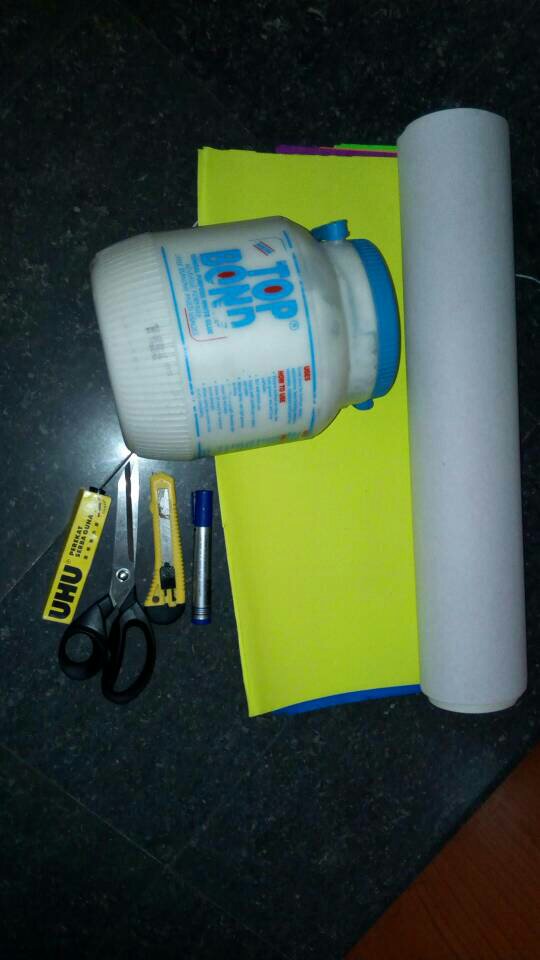

The red coloured paper is inbox paper it is thicker than the normal cardboard sheet.
I used the inbox paper because I was not able to lay my hands on the thick cardboard, inbox paper is thicker than the normal cardboard sheet.
Group Member: Ok ma
Mrs Okenwa Adanne: Inbox paper comes in various colours, but the thick cardboard is carton colour, so you have to cover with your desired colour before using.
Group Member: OK ma
Mrs Okenwa Adanne: Glue several inbox paper together to get desired thickness. I glued 5 together.
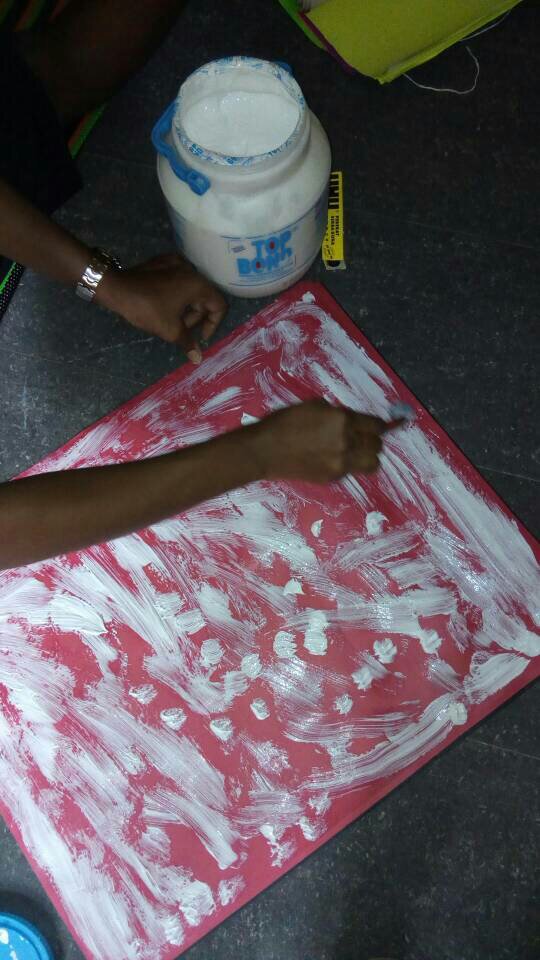

Allow to dry.
Go to Microsoft word, print out the alphabets using your desired font and size.
For this large MAB I used Ariel narrow size 440.
For the small MAB size 300 is ideal.
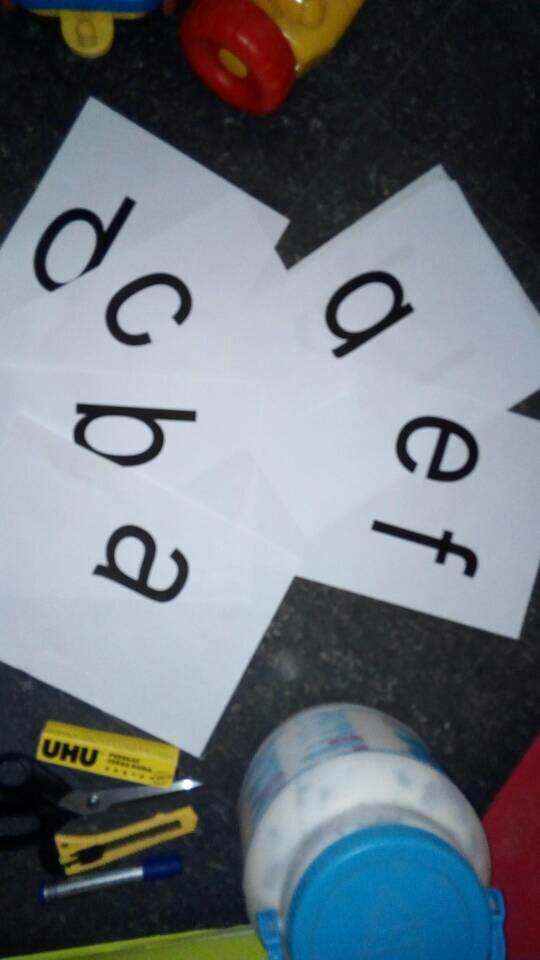
This is the printout.
Cut out the alphabets with scissor and carve with cutter.
Use cutter to carve out those letters that have “O” in the middle.
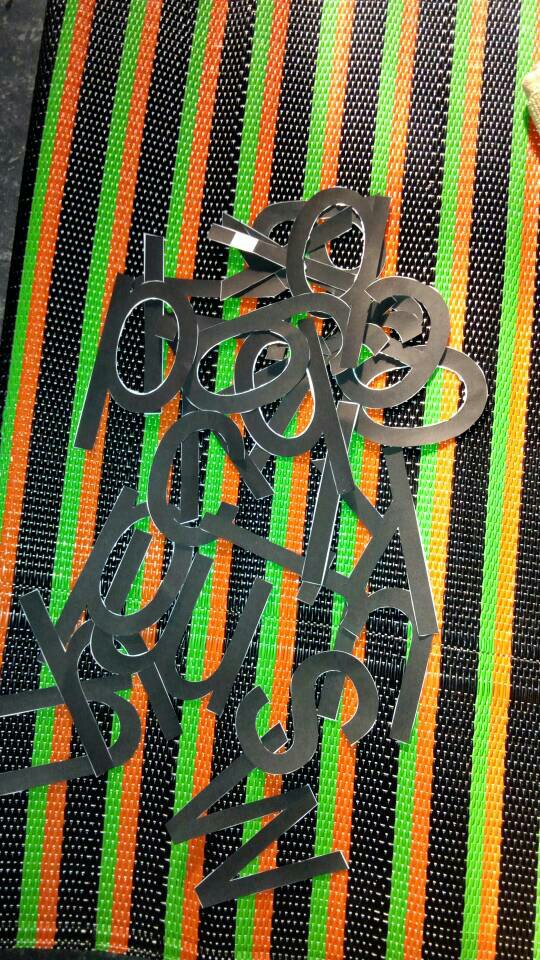
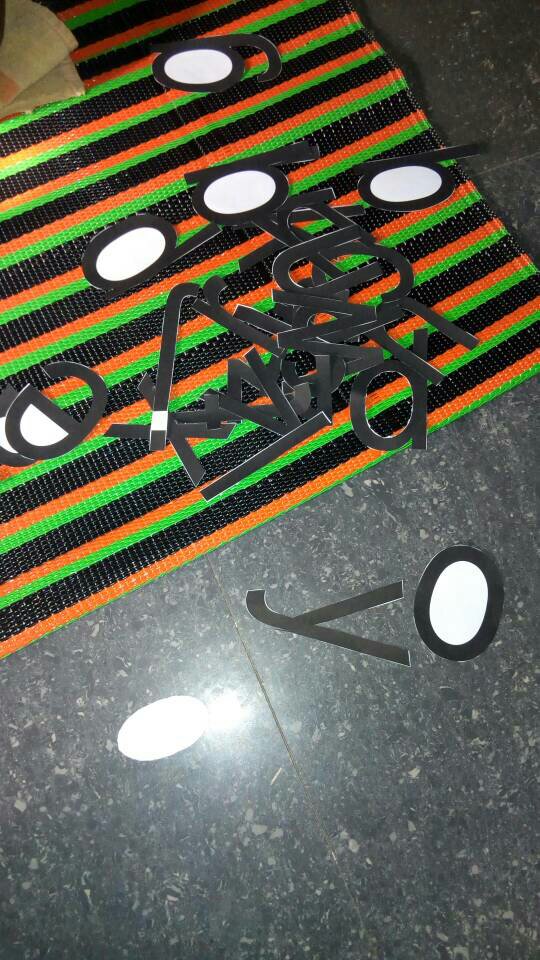
Place the wrong side of the alphabet on the back of the inbox paper.
The inbox paper should be dried by now.

Cut out and carve alphabet using cutter and scissors.
You could just draw the wrong side of the alphabet on the cardboard if you already have stencils.
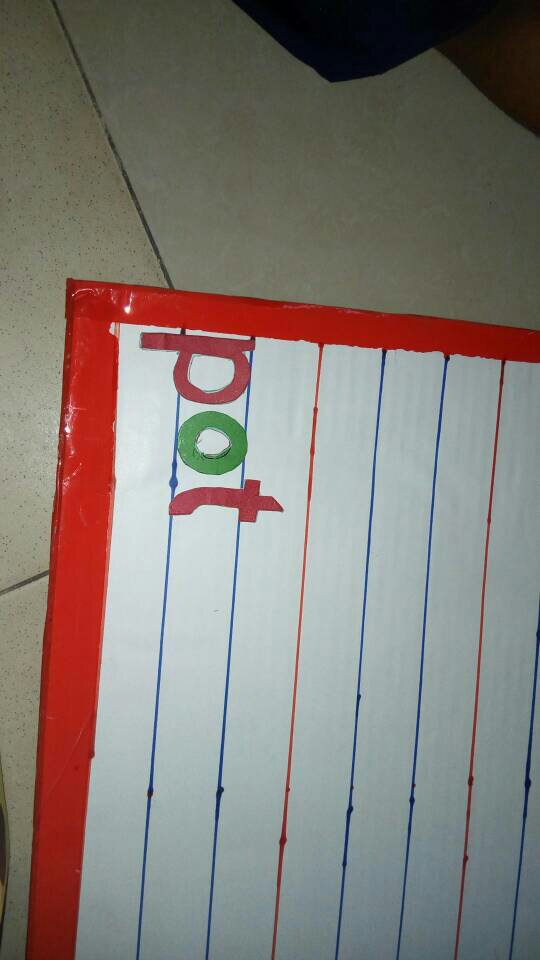
Use different colours of card board for the front and back to make it easy for pupils to distinguish.

It should look like this when you are done.
You can now use these as stencils to make as many sets as you want.


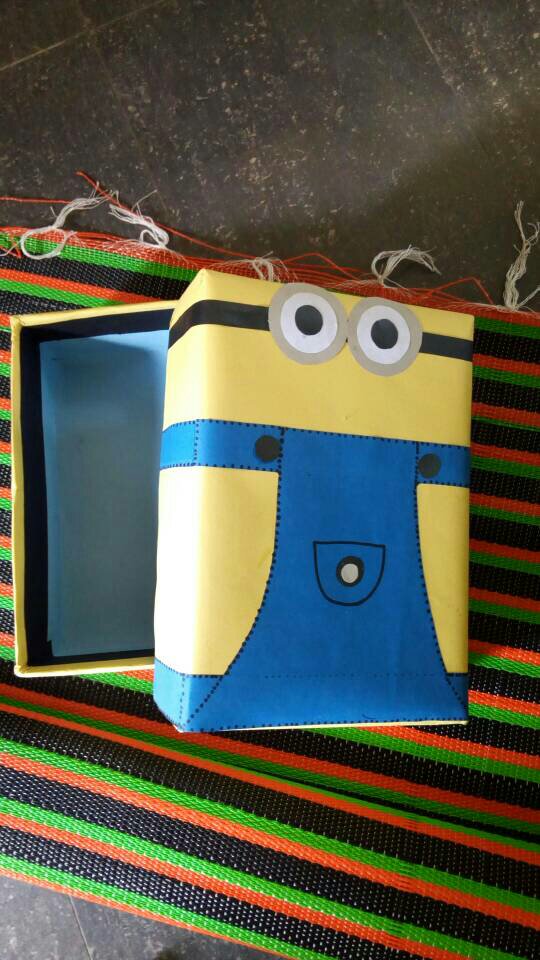
You could make a storage box for durability.

This was made from carton to compliment the MAB.
Please we can now ask questions in case there is any before I move to how to make the storage box.
Ayopeju Falekulo: Wow! Thank you so much.
Mrs Okenwa Adanne: You are welcome ma.
Ayopeju Falekulo: This shows us that we certainly can make Montessori work without having to break the bank!
Group Member: Welcome ma
Mrs Okenwa Adanne: So true ma, this has really helped us a lot.
Group Member: Thank you so much ma. Am a parent of two kids in a Montessori school and am enjoying this.
Mrs Okenwa Adanne: How to make a storage box.
Group Member: Ok
Group Member: Thanks ma
Group Member: Following
Group Member: We appreciate you ma. Keep the good work going.🖐
Group Member: Are these printouts glued to the cardboard
Mrs Okenwa Adanne: The box measures 7/11 inches while the cover measures 8/1 inches.
Group Member: Ok
Group Member: What kind of board should be used for storage box
Mrs Okenwa Adanne: The cover measures 8/12 inches.
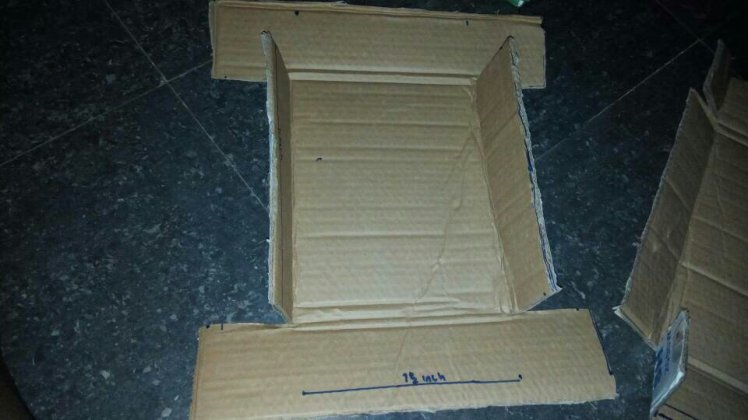
Mrs Okenwa Adanne: You can use any carton, this is a television carton, it is quite thick.
The thicker the better.
This is a rectangular box: a square box will have all sides equal.
Group Member: OK thanks
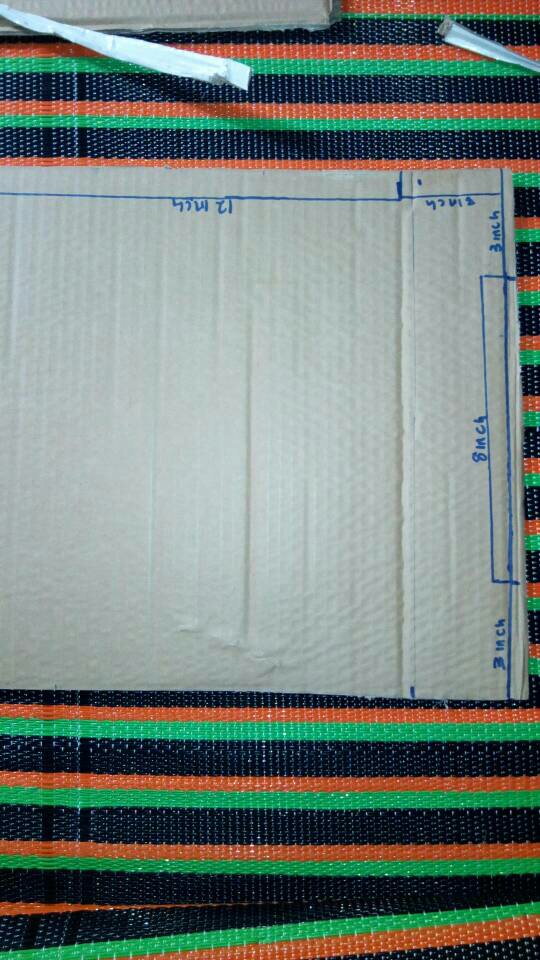
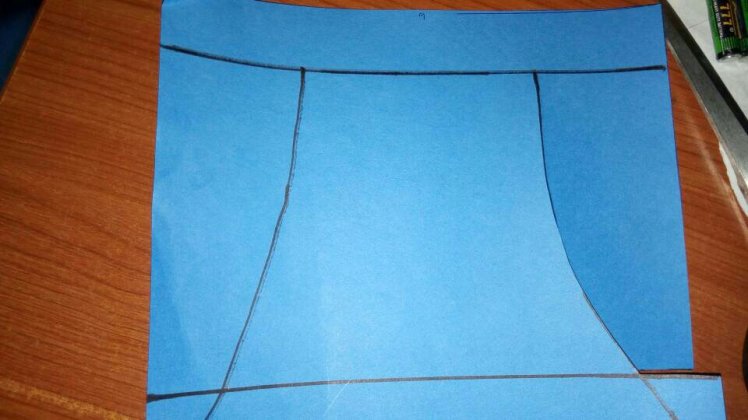
Mrs Okenwa Adanne: For the box, the carton should measure 13/17 inches.
From the edge measure 3 inches, then measure 7.5 inches at the middle and then you are left with 3 inches at the other end
The middle should be 7 inches not 7.5
For the cover use a carton measuring 18/14 inch.
For length measure 3 inches from the edge, 8 inches in the middle and you are left with 3 inches.
Use the scissor to cut at all the 3 inches mark along the length.
Fold the edges.

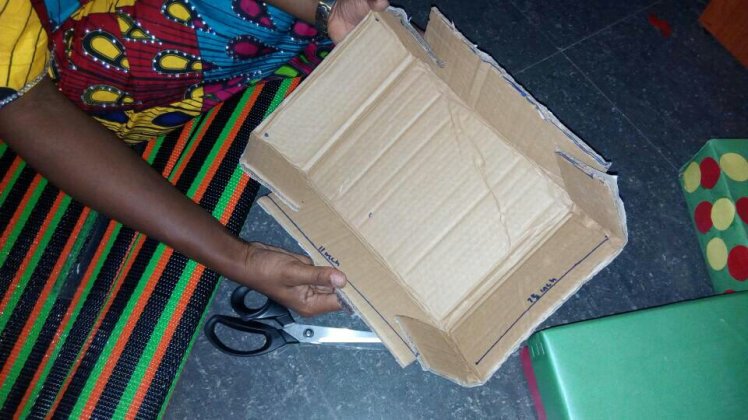
Secure with glue or stapler hold in place until dry when using glue.
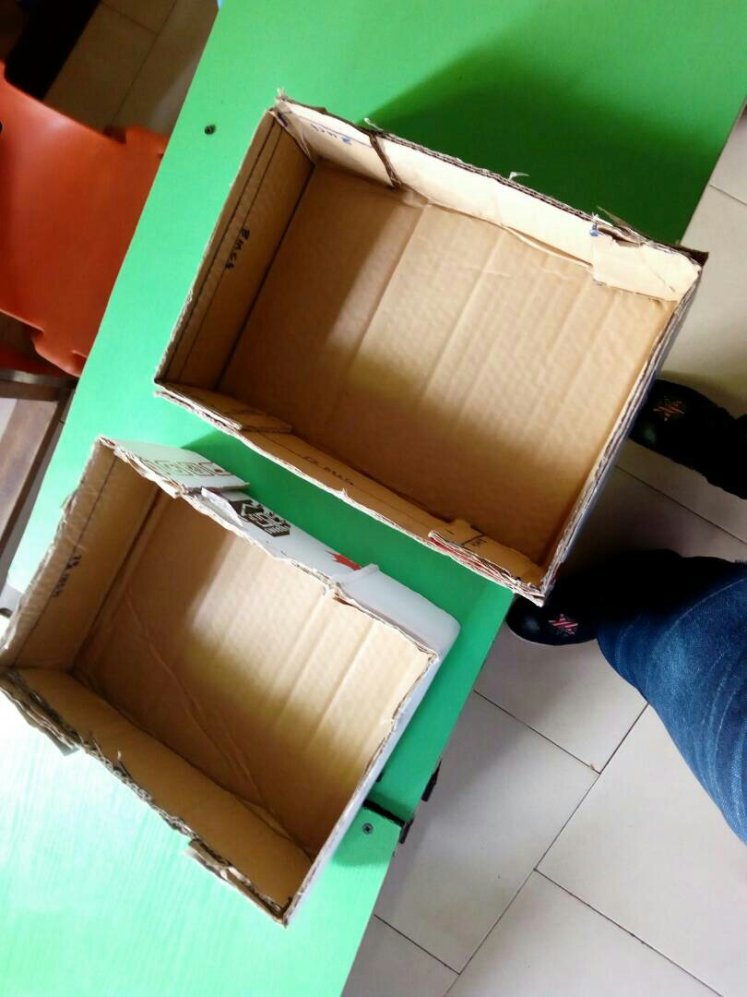
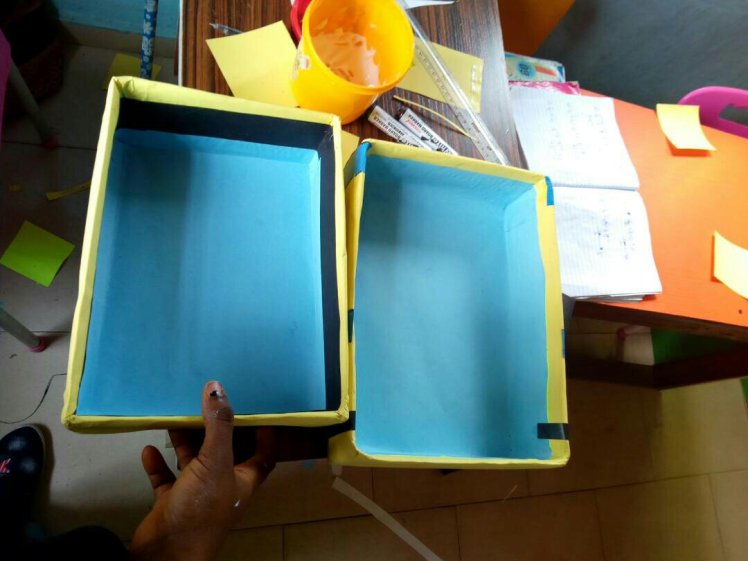
Wrap inside and outside the box with sugar paper.
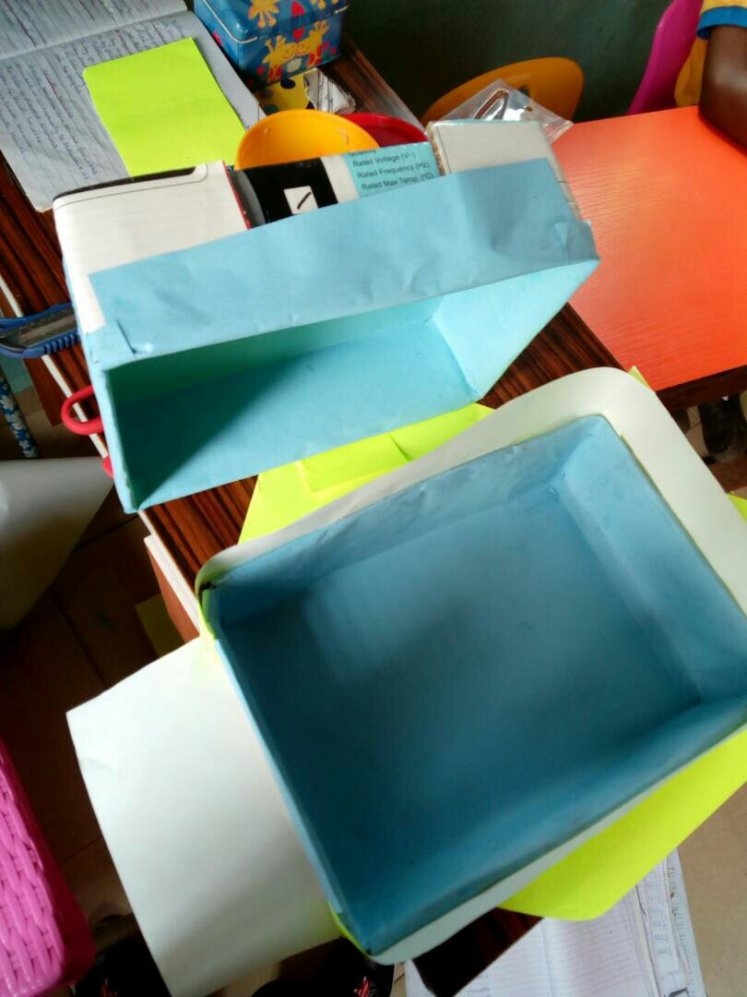
To design the box.
Draw any article of your choice and cut out.


Paste on the box.


You can section the inside if you desire.
Group Member Lovely
Group Member: Thanks a lot
Group Member: Wow! I’ve being thinking of how to make this. Thanks a million.
Group Member: Thanks ma, God bless you ma
Mrs Okenwa Adanne: You are welcome.
Group Member: Please I have a question. How many letters should I make? Eg how many a, b, c, d?
Group Member: Thumb up
Group Member: Thanks so much.
Group Member : I’ve been secretly learning for a while now
But I have to say something now
What I have to say is a big THANK YOU
Mrs Okenwa Adanne: You can make as much as possible. I made as much as 30, so that 10 kids can use at once.
Group Member: Well done ma
Group Member: OK thanks
Mrs Okenwa Adanne: Yes they are, but if you are using stencils just use a marker to draw on the cardboard.
Group Member: Wow I was really educated.. Thanks
Group Member : Thank you ma
Ayopeju Falekulo: Wonderful presentation.
Thank you.
A round of applause
Group Member: Bravo.
Ayopeju Falekulo: Thank you so much Mrs Okenwa Adanne.
Mrs Okenwa Adanne: You are welcome, its a pleasure to speak on this great platform.
Mrs Okenwa Adanne: Thank you all for listening.
Group Member: God bless you ma
Group Member: Thank you so much
Group Member: Thank you ma
